
Quickstart
By the end you’ll have a pipeline built around one of your own work items, running on your machine. It takes about ten minutes in one terminal session; the browser only comes in for sign-in, setup the terminal can’t finish, and the pipeline graph.
Before you start
Section titled “Before you start”- A git repository with an
originremote. - Node.js or Bun.
- Claude Code, Codex, or GitHub Copilot — or an API key from any AI provider.
Details are in Installation. Steps that work inside your code run in a container, so the run may also need Docker — see Runtime.
-
Install the CLI
Terminal window npm i -g @boboddy/cliPrefer Bun? See Installation.
-
Link your repo
From anywhere inside your repository:
Terminal window boboddy initterminal ◇ Repository: ~/my-repo [0s]● Remote: git@github.com:you/my-repo.git● Not signed in to https://app.boboddy.dev. Starting sign-in…◇ Signed in as you@example.com [14s]◇ Requirements verified [1s]◇ No project found for this repository yet [0s]◇ Create Boboddy project “my-repo” from GitHub you/my-repo?│ Yes◇ Created project “my-repo” [4s]◇ No devcontainer yet [0s]▲ Boboddy runs every step inside your project's devcontainer, and this repository does not have one yet. Nothing to do: `boboddy pipelines design` will write a `.devcontainer/devcontainer.json` during the session, and your first pipeline run is what verifies it builds.◇ No AI provider connected yet [0s]● The pipeline designer runs on OpenCode and connects it to a model the first time it starts — nothing to do now.◆ Design your first pipeline now?│ ● Yes / ○ Noinitsigns you in, then finds or creates the project for this repo. The one decision isCreate Boboddy project … from GitHub?— say yes, and your issues keep syncing in as work items. If it isn’t asked,initopens a pre-filled page in your browser; pick your repo from GitHub there if you can (see Connect GitHub or Jira).The notices need nothing from you. Answer yes to
Design your first pipeline now?. -
Pick a work item
terminal ┌ Boboddy pipeline designer● Logs → ~/.boboddy/logs/worker-2026-10-07T15-04-12-123Z.log◆ Signed in as you@example.com◇ 3 work item(s) [1s]◆ What should this pipeline handle? (Ctrl+C to cancel)│ ● Checkout crashes when a coupon is applied twice (github)│ ○ Add CSV export to the orders page (github)│ ○ Flaky test: cart total rounding (github)│ ○ Search for a different item…│ ○ + Paste a link/id, or describe a new one…└◆ Designing for “Checkout crashes when a coupon is applied twice”The designer builds every pipeline around one real work item — its interview asks how this item should be handled — so pick something typical. Not listed? Search, paste a ticket link, or describe one in a sentence.
- Connect your AI tool
The designer runs on a Boboddy-managed OpenCode runtime that needs its own connection to a model. The first time, it names the AI tools it finds and hands you OpenCode’s provider menu.
terminal ◆ Scaffolded the pipeline builder directory● Installing pipeline builder dependencies…◆ Dependencies installed◇ AI runtime ready [41s]● Connect an AI provider● The designer runs on OpenCode, which needs its own connection to a model.● This is one-time: the same connection runs your pipeline steps later.● You have Claude Code. In the picker choose "Anthropic" and paste an API key from console.anthropic.com — a Claude Pro/Max subscription can't be reused here.└ Opening the provider connection…Connect the tool you already have:
You have In the menu, pick Claude Code Anthropic, then paste an API key from console.anthropic.com — a Claude Pro/Max subscription can’t be reused here GitHub Copilot GitHub Copilot, then GitHub.com (Public) (or GitHub Enterprise), and enter the device code at github.com/login/device Codex OpenAI, then ChatGPT Pro/Plus (browser) to use your ChatGPT subscription (or Manually enter API Key) None of these Any provider (Anthropic is recommended), then follow the prompts — see OpenCode’s Connecting providers It’s one-time: the same connection runs your steps later. Boboddy never reads those tools’ credentials. Already exported a key such as
ANTHROPIC_API_KEY? This step is skipped. -
Talk to the designer
terminal ┌ Boboddy pipeline designer● Logs → ~/.boboddy/logs/worker-2026-10-07T15-04-12-123Z.log◆ AI provider ready (anthropic)◇ Studio running at http://localhost:51234 [0s]└ Starting the designer… The graph is in your browser; the designer is in this terminal.Your terminal becomes the designer, and your browser opens the studio: a live graph of the pipeline that redraws every time the designer saves a file.
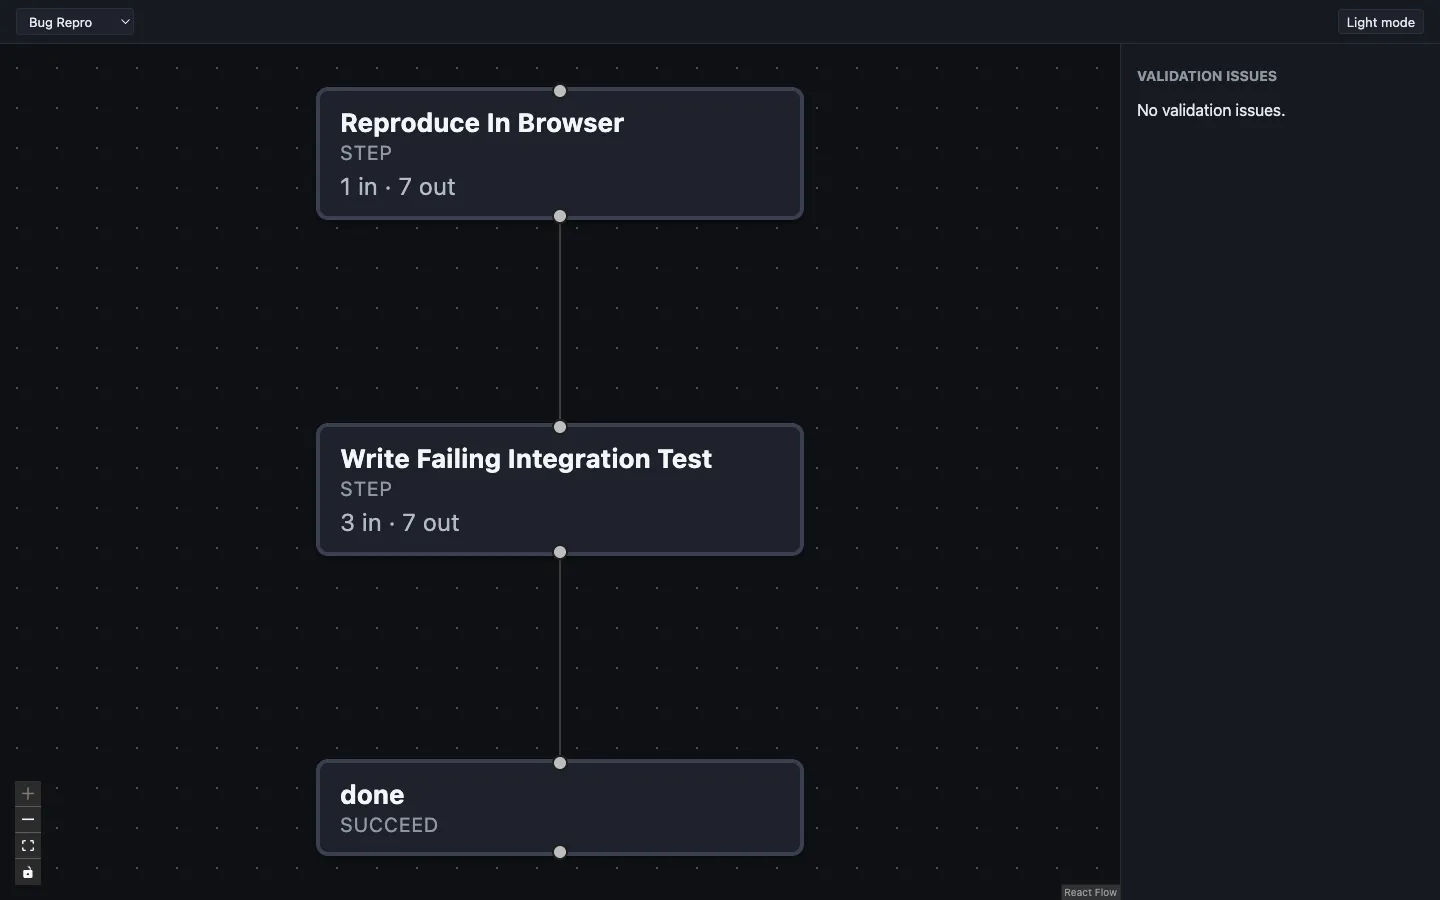
The designer reads your repository first, then interviews you about the item you picked, one question at a time:
- What should come out the other end? What you’d want waiting in the morning, and what you’d need to see to trust it.
- What can the environment reach? The tools you’d use for this item, step by step. “Nothing but the repository” is a fine answer.
- What must never be touched? Production writes, customer data, anything that sends email or charges money.
It proposes two or three ranked designs and builds the one you pick, plus the default pipeline assignment that routes new items to it. With no
.devcontainer/devcontainer.json, it writes one (Runtime). For a secret it asks only the variable name; you put the value in.boboddy/.env(Secrets).Finally it typechecks and runs
boboddy pipelines push, which always asks for permission. Say yes: that’s the moment your pipeline reaches Boboddy. Then quit the designer with/exit. -
Run it
As the designer closes, it checks that your pipeline’s first step can actually run, then asks whether to run it on your work item now:
terminal ┌ Run it● Logs → ~/.boboddy/logs/worker-2026-10-07T15-04-12-123Z.log◇ First step healthy [1m 48s]◇ Run your new pipeline on “Checkout crashes when a coupon is applied twice” now?│ Yes◇ Run queued [0s]● A failed run — a step, or the devcontainer build — is something to take back to the designer: run `boboddy pipelines design` again and tell the agent what happened. The edit loop is the repair loop.└ Starting the worker…Say yes. It queues the run and starts a worker in the same terminal:
terminal ┌ Boboddy worker● Logs → ~/.boboddy/logs/worker-2026-10-07T15-04-12-123Z.log● Using source branch: main● Project <project-id> · concurrency 1◆ Worker ready (<worker-id>)● Claimed 1 step◇ step <step-id> starting devcontainer… [0s]◆ step <step-id> Running postCreateCommand... · 9s◇ Step <step-id> succeeded (2m 26s) [2m 16s]● Claimed 1 step◇ step <next-step-id> starting devcontainer… [0s]The worker polls until you press Ctrl+C. If the check or a step fails, run
boboddy pipelines designagain and tell the designer what happened. Said no? See Run a pipeline on any work item. -
Watch it in the dashboard
Open your project in the dashboard, go to the Executions tab, and select the run. The run page shows the pipeline graph and each step’s status. Select a step for its logs and output; its Evaluation facts are the signals the step reported.
Signals drive advancement: the run moves on, or — when a
blockWhenrule matches — stops as Blocked until a human steps in. That moment is the core of Boboddy.
What you have now
Section titled “What you have now”Directorymy-repo/
Directory.boboddy/
- boboddy.jsonc the project id
- .env.example secret variable names, only if a step needs any
Directorypipeline-builder/
<your-pipeline>.tsthe pipeline and its steps- default-pipeline-assignment.ts
- package.json
- …
Directory.devcontainer/
- devcontainer.json written by the designer if you had none
Commit .boboddy/ and .devcontainer/; the builder’s .gitignore already
skips node_modules/, push.ts, and
lockfiles. Never commit
.boboddy/.env.
- Change this pipeline — run
boboddy pipelines designagain with another work item; it edits what’s there instead of starting over. - Let a step read your repo — when a step needs your code, it runs in your devcontainer.
- Automate intake — connect GitHub or Jira, and route new items with Default Pipeline Assignment.
- Scale workers — concurrency, polling, and work branches.
Rather write pipelines by hand? Start from
boboddy pipelines init.